Thursday, February 21, 2019

LiveBinders

Most of you know that I try to be a very organized person. Everything has a place and should be kept there. This is not because I am super uptight; instead it is because I am very forgetful. If I do not remain organized, I will never find anything!

Over the years, I have collected various websites to share with teachers. I found the best way to share these sites is through the use of a LiveBinder. A LiveBinder is basically what the name implies. It is an online, living binder that can be used to store nearly any kind of information...photos, documents, websites...anything digital. What I like best about LiveBinders is that I am able to 'tuck' things away into sections according to topic, thus allowing me to be organized:)

Here is the link to one of my LiveBinders.  It is filled with a wide variety of technology tools useful to both teachers and students. Just browse through the section titles. I am sure you will find something you can use!

Technology Tools for Teachers and Students

As we all know, a website that is supported today may not be supported tomorrow. Please let me know if you find that any of the links in this binder no longer work. I will gladly remove them from the binder.   

Sunday, February 3, 2019

Google Tools and Resources for Teachers and Students (K-12)

While I am browsing through educational websites and social media, I like to keep a list of ideas and websites I could use in the future. Instead of just keeping these to myself, I wanted to share these resources so others can use them as well. When browsing online, I found the format for the documents below. I thought they looked visually appealing, organized, and easy to navigate. While I kept the same format, I have updated each document below with tools I have found useful or interesting. Each of these resource documents contain resources related to Google tools. I hope you find them useful. Feel free to share ideas you feel I should add, or let me know if a link no longer works. As with anything technology-related, these are ‘living’ documents and will be updated
frequently.  
You can access each document by clicking the content area name link found below the images. All documents are shared as ‘View Only’. If you see a document you would like to use, open it and MAKE A COPY. As always, I hope you find something new and exciting that can be used in your classrooms!

Math Resources


Geography Resources


Language Arts Resources


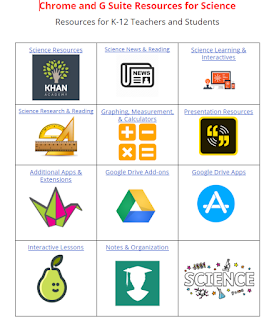
Science Resources


Social Studies Resources


World Language Resources


Monday, January 28, 2019

Graphic Organizer Templates

I have always been a visual learner; I love seeing how ideas relate to one another. Many of your students may feel the same way. They seem to build comprehension of content through organizing or manipulating information into chunks for better understanding.

As I was going through files in my Google Drive, I came across a folder of graphic organizer templates I had started collecting. Since I shared a collection of Google Slide templates in my last post, I thought some of you might like another collection of templates to use with your students.
Now, I know many of you high school teachers are ready to tune me out...don't do that just yet!

Graphic organizers are useful for students in all grades! These templates can be modified and printed for hard copy use or can be shared with students for completion on a computer. From pre-writing organizers to templates for cycles and sequences, I am pretty confident there is something here for everyone. What I like best is that these templates are just starting points for each of you...You are easily able to modify each one to make it more relevant to your lessons.

The items in this folder are shared as ‘View Only.’ If you see a template you would like to use, open the template and MAKE A COPY. You can save the templates as you need them or you could make copies of all of them and save these copies into your own template folder, similar to mine. You would then have a variety of resources to use as needed.

Just like the Google Slide templates, all of these templates are all free!

I will continue to add templates to this folder as I find them. You may want to check back from time to time to see what is new.


Click here to access the Graphic Organizer Template Folder


Tuesday, January 22, 2019

Google Slide Templates

I love just about everything Google. It has become my go-to software of choice. With that said, it has often frustrated me that there are so few templates to use when creating Google Slide presentations. If you are like me, you will LOVE what I am about to share! I have started collecting Google Slide templates and want to share a Google Drive folder of these templates. The items in this folder are  shared as ‘View Only.’ If you see a template you would like to use, open the Slide presentation and MAKE A COPY. You can save the templates as you need them or you could make copies of all of them and save these copies into your own template folder, similar to mine. You would then have a variety of resources to use when you want to make new presentations.

It is even better when you learn that all of these templates are all free. I found most of these templates on a site named Slide Carnival. All the creator asks you to do is to give her credit at the end of your presentations. Easy peasy!

I will continue to add templates to this folder as I find them. You may want to check back from time to time to see what is new.


Wednesday, December 12, 2018

ClassroomScreen

As Christmas break draws near, we all know students have a little 'extra'...extra energy, extra loud voices, extra excitement. Teachers are always looking for new ways to help guide student behavior. I have found a new tool that could help! You may want to try Classroomscreen.

This tool's usage potential does not end after the Christmas season. Many times you would like your students to work in cooperative learning groups while you work with another group. What if you could quickly and easily provide directions for multiple groups, include a timer each group, group noise expectations, and even visually display classroom noise levels?

This short 2-minute video will show you all that this website can do for you. I think you will like it!

Wednesday, November 28, 2018

Student Use of Grammarly

Last month, I shared information with you about using the tool, Grammarly, as a teacher. Did you know that our students in grades 6-12 have access to Grammarly as well? With research paper season coming up after Christmas break, this might be a useful tool for you to have your students begin using.

How do students locate Grammarly?
Grammarly is already installed for each student as a Google Chrome Extension. They need to go to the top right corner of their Chrome browser and look for the green Grammarly icon. Once they click on this icon, they will want to select both of the buttons below. Once they are both green, they are both turned on and ready to go.

Currently, Grammarly is only interacting with Google Docs in a Beta format. While the Beta version does work, I would recommend students first typing their papers in a Google Doc and then using the Grammarly website tool. Once students have finished typing their documents, they can copy and paste it into the Grammarly tool. This is quick and easy to do.

Just have students follow these steps:

1. Click the EDIT tab and then SELECT ALL.
2. Clicking the CTRL + the C key will copy all of the selected information.
3. Click back on the Grammarly icon in the top of the Chrome browser. Then click on NEW DOCUMENT in the bottom left corner of that window.

4. This action opens up a new webpage on the Grammarly site. Press CTRL + V key to paste the information into the Grammarly tool.
Grammarly begins working automatically and will offer suggestions to students that they could improve their writing. Writing issues such as unclear antecedents or passive voice will appear on the right side of the screen. It is up to the students to determine how best to use this information and revise their document.
As with most tools, there are a variety of other ways students can use Grammarly. The above steps are just the way I tend to use this tool. I am sure your students will be able to navigate this tool easily.


Friday, November 9, 2018

Paint 3D (Math and Science teachers...This one is for you!)

Do you remember when you were in kindergarten and used to paint? There were many times I painted a picture that I wished would come alive. Puppies, rainbows, people...it reminds me of an old cartoon, Chalk Zone. Everything the little boy drew would come alive and interact with him. In some ways, this ability is not so far-fetched anymore. Microsoft Paint 3D allows you to create your own digital three-dimensional images.

By now, even if you are not a math or science teacher, I hope you are hooked and want to see more. You can follow the steps below to begin creating shapes and images on your own. (Even though it looks like there are lots of steps, they are really easy to follow. Don't let the length of this post scare you away!)

In order to begin, you first must locate the Microsoft Paint software on your computer. This software is not set up as an icon on your toolbar, so you will need to search for it. Click in the search box in the bottom left corner of your screen and type in Paint. You will see the Paint application under the BEST MATCH section. Click on Paint to open the program. (You may want to right-click on this icon now at the bottom of the screen, in the toolbar, and pin it to the taskbar.

Once you open Paint, it looks like a basic drawing program. Look on the ribbon across the top screen and locate the EDIT WITH PAINT 3D icon. Click on this to open the enhanced version of Paint.

Once you have opened Paint 3D, you will see the Welcome screen. Click NEW.
Next, click on 3D Shapes at the top of the screen.


On the right side of the screen, it allows you to select the shape you would like to draw. I chose to make a pyramid. All I did was click and draw on the blank canvas until I had the size of shape I wanted. Now I can click on the icons on the side of the image to turn the image and see all sides.

Now, what is an educational application for this drawing? Let’s start with math. Whenever I turn or rotate the shape, I see the degree of movement. Students could also use the ruler feature found in the Windows Ink Workspace to measure the sides for area or perimeter. I am sure you can imagine how this could be expanded upon. What about building castles out of these shapes and finding the surface area of the building? You could create some amazing tesselations using these shapes as well.

This program gets even better for science. Once again, look at the top of the screen at the menu options. This time, click on 3D Library.

Once the 3D library opens, type SCIENCE in the search bar. This is where it gets really exciting!
I selected the volcano image. Once the image is loaded onto my blank canvas, I can turn and spin the image so I can see it from all angles. This feature gives students a virtual view of images, such as skeletons, and even allows them to label the different parts.
Note: When searching for images in the 3D library, be sure to look in both MODELS and BOARDS within the search to see a larger number of image options.

If you have a few minutes this weekend, you may want to experiment with Paint 3D. I will share some additional ideas for using this software in the near future.


Friday, November 2, 2018

Teleprompter Tool

You want your students to create videos, but you do not want to see them looking down to read from a paper script. Here is a solution! Show them how to use this teleprompter tool, CuePrompter.  CuePrompter will allow students to copy and paste their script into a textbox. There they can determine several settings, such as how they want the words to appear, how big the words should be, and even how fast the words should scroll across the screen. Combine this tool with Screencastify, and they are set for simple video making! It is a simple tool that students will pick up on quickly!


Monday, October 29, 2018

Exit Tickets

I know that many of you already use Exit Tickets at the end of class, but I wanted to share a slightly different approach to using Exit Tickets. Why not use this tool to gauge student thoughts on your class? You can even use the results to see if your students felt challenged. Below is a link to a template for an Exit Ticket. You are free to modify this as you wish.
Exit Ticket Template

Using this Exit Ticket

With about five minutes left in class, you could use Google Classroom to push your Exit Ticket out to your students. If you wish to ask students a specific question over content shared in your class, you can either write the question on your board or add it in the instructions in your Google Classroom assignment. While your students are filling out their Exit Tickets, you may also want to take time to reflect on how you felt the class went and what changes you might want to make before your next class. 

Not only is this a way for students to reflect on what they learned, but it is also instant feedback for you on how the lesson went, including many social-emotional factors, such as "Today in class, I felt I was treated kindly by my teacher."

Reflecting on the Data

As with any Google product, it is fabulous that you can watch student responses to this Exit Ticket in 'live time.' If a student selects 'disagree' to "I felt I was treated kindly by my teacher," it may force you to immediately reflect on the interactions in class and how you may have handled a situation in class.

Getting a Little Technical

If you want to enhance the results in your response sheet, you can always add some formulas and color. First, insert a row below the questions and use the formula below to calculate the percentage of agree responses for each statement. [Formula: =(countif(I3:I, "Agree"))/counta(I3:I), then Format >Number > Percent}. Visually, you can also use Conditional Formatting to fill all cells with "Agree" green and "Disagree" red. 


Thursday, October 11, 2018

Grammarly

Do you ever stress when you need to send an important email or write something others will read? I do! I always feel my writing will not be clear or I will misspell a word. This is when Grammarly saves me and helps me become a more confident writer. 

Grammarly is a tool that edits as you write. There is a paid version and a free version. Even if you do not want to pay for access, the free version offers helpful suggestions. The premium version will also allow you to check work for plagiarism. As a teacher, you HAVE to love that! The video below will give you a quick tutorial on using Grammarly. 


Tuesday, October 9, 2018

ScreenShade-Chrome Extension

ScreenShade is a tool that could be used by all of you. It is a Google Chrome Extension and is free. This Chrome Extension allows you to place a ‘pull up/down shade’ over your screen when showing a website. Why would this be good? Have you ever tried to project information to your students but you didn’t want them to see EVERYTHING on the website at once? With this extension, you can pull the ‘screen’ down a little at a time, allowing you to keep students focused on the content you want them to see at the moment.


Creating Assignments in Google Classroom


One of my goals before I leave for Oklahoma is to create a video library that you can refer to when you need assistance with various software and tools. The first series will be on the newly updated Google Classroom. Many of you have been extremely independent in discovering how to use the new platform. Hopefully these videos will help others become more comfortable using this fabulous tool.

This first video is on Creating Assignments. Please excuse my ‘ums’. I did not take the time to fully edit this video because I wanted to share it right away. Please let Chris or me know if you need any assistance with Google Classroom or any other software and tools!


Google Classroom Parent Help Videos

A new school year always brings many changes. Our school recently transitioned from using a learning management system to using Google Classroom. Not only is this a new tool for teachers, but it is also a new tool for our parents. Here are a few videos you may want to share with parents if they ask about how to use Google Classroom.